
Things You Need:
Hot glue (A LOT of hot glue)
Twine/String etc.
Sticks/twigs (We honestly went out and trimmed some off of fallen branches. You need a fair few sticks, but it shouldn't take you very long if you go tramping through a forest with a pair of clippers)
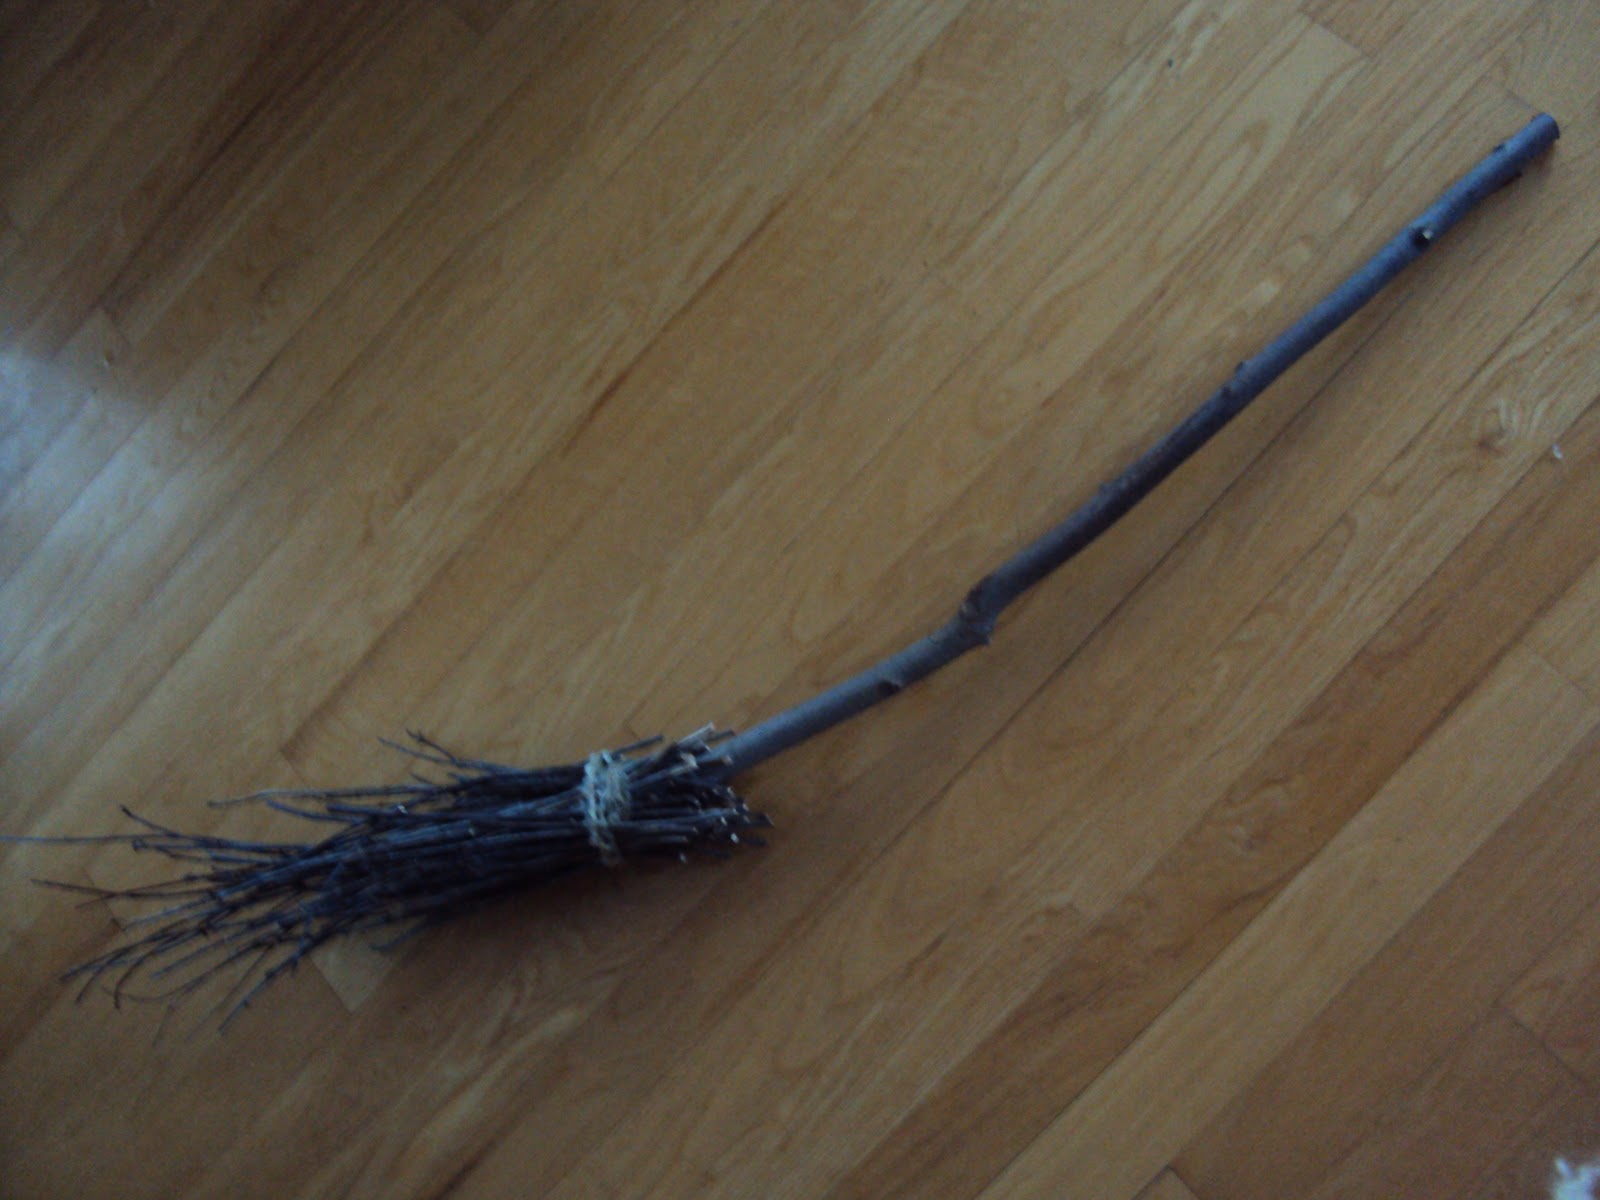
A long broom-thickness stick, preferably fairly straight
Directions:
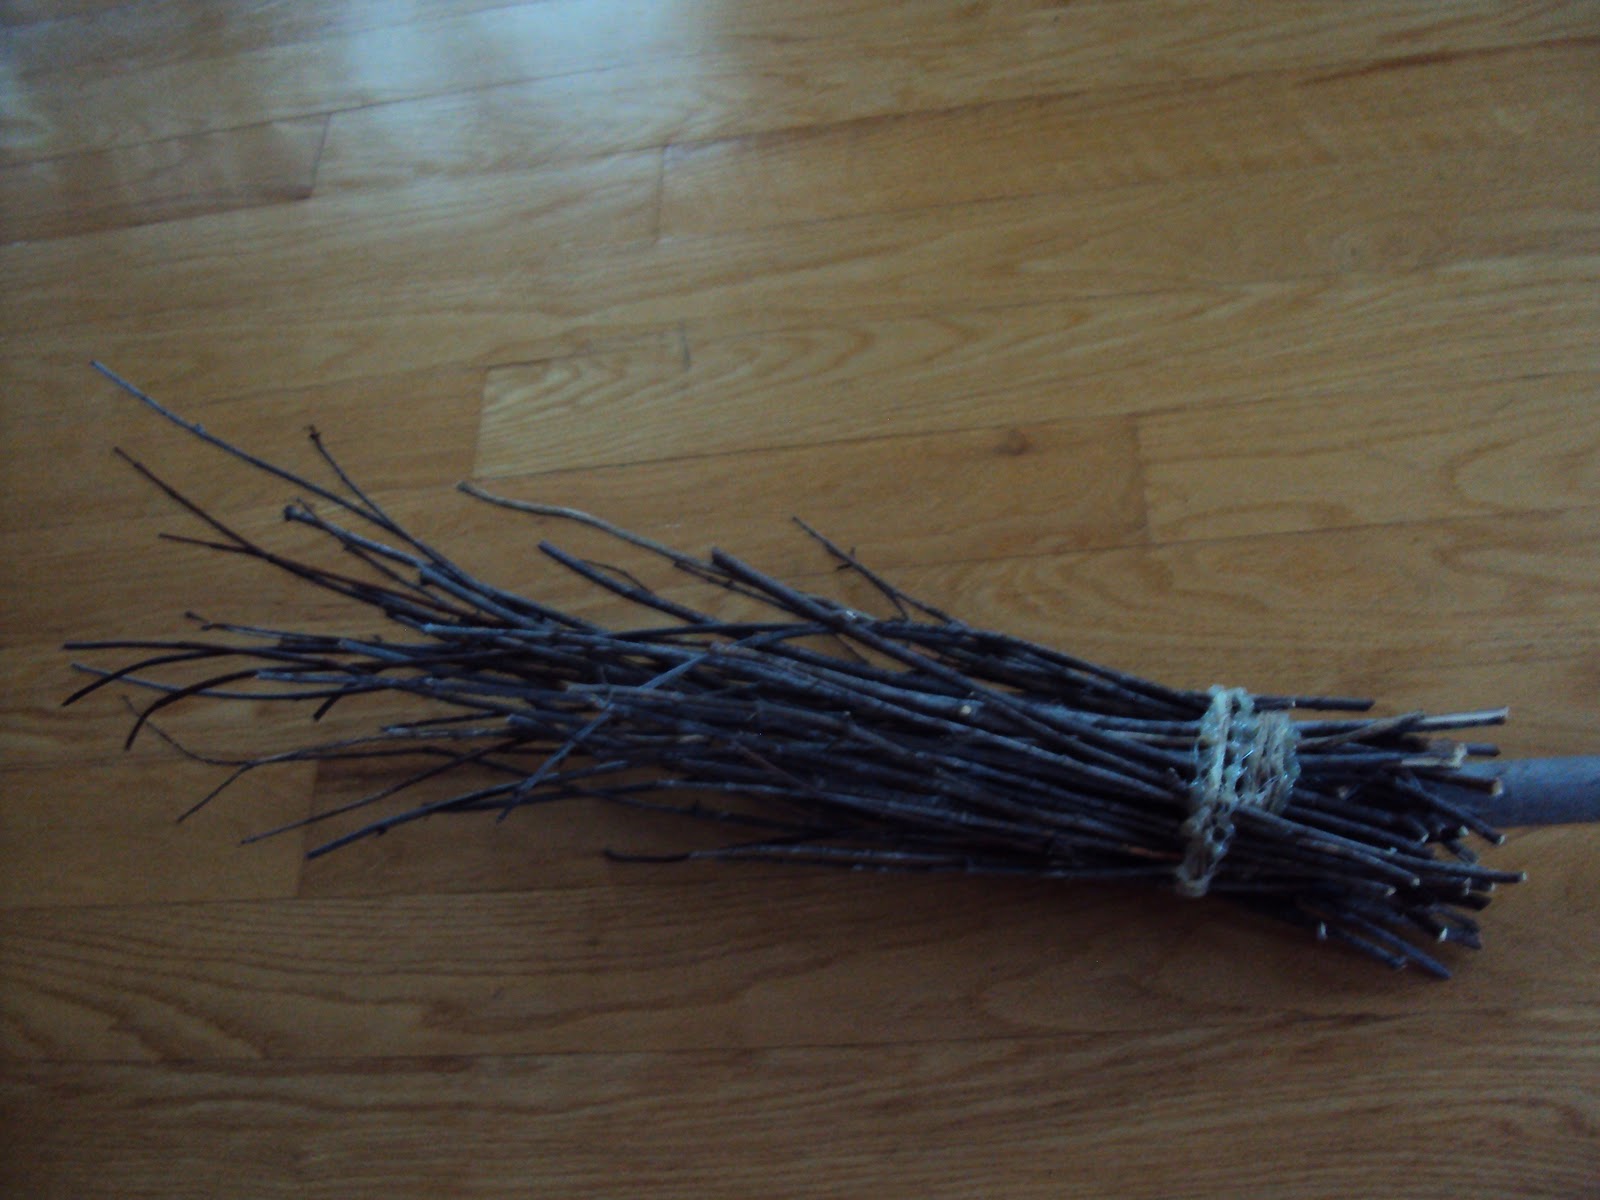
- Sort our your twigs, the ones that will eventually be the tail of your broomstick, into piles depending on length. One pile should be for the short twigs, one for the long ones, and one for the medium twigs
- Take the long twigs and wrap them evenly around the bottom of your broomstick, approximately 6 inches (16cm) from the end of the broom handle while leaving about an inch (3cm) of the twigs on the other side of the twine. You may need someone to help you with this because otherwise the next step will get quite tricky...
- Tie the sticks firmly to the broom by wrapping the twine around and tying it in knots multiple times.
- Adjust the positions of the sticks so that they are evenly spaced around the bottom of the broom. Dribble hot glue in the spaces and around the twine to secure it firmly. It was useful to have one person rotating the broom while the other person applied the hot glue. You may have to go around a few times: once around the top of the twine, once around the bottom of the twine, and once to ensure the gaps were filled (this is why you need a lot of hot glue).
- Follow steps 3 & 4 with the medium sticks and then the short sticks, allowing the glue to dry in between.
- When all of your sticks are glued on and it looks like a broomstick, take some small pieces of twine and wrap it around your broomstick end every 2 1/2 inches (7cm) or so down, tying it tightly enough to shape your twigs into the desired 'broomstick' shape (i.e. the twigs are not sticking out all over the place)
- Leave your broomstick for about a day or two (or longer, it won't hurt) so that the twigs stay in that shape. When you are ready to take the twine on the end off, trim any twigs that still haven't achieved the broomstick shape.
- Take some remaining twine and use it to cover up the hot glued twine and twig section. You can also do a second wrap around the twigs lower down, however, we did not do this
There you go, your own home-made broomstick! If you want to go the extra step farther and you happen to have an engraver, you could also engrave the words "Nimbus 2000" onto it like we did. It made for a neat effect, and you could even fill it in with gold paint!

This is really cool. You're so resourceful and creative with your project ideas!
ReplyDeleteCOOOOOOOOOOLLLLLLLLL!!!!!!!!!!!!
ReplyDeleteMine is a firebolt
ReplyDeleteFigured it would be really that easy, might be trying for my own.
ReplyDeletebuy logo design
Thanks for sharing it with us.
ReplyDeleteIt's very helpful post.
law dissertation Writing Service